Actus du monde de l'auto et du film adhésif
Covering
-
Erreur de pose covering : diagnostiquer les problèmes et trouver la solution adaptée
 meilleure vente Covering
 -
Guide complet et conseils d'entretien : Comment nettoyer un covering efficacement ?

-
Nettoyer ton covering mat : guide expert et erreurs à éviter

-
Quelles sont les tendances en covering pour l'année 2026 ?

-
Variance Auto x Hexis : bien plus qu’un partenariat… la couleur exclusive révélée

-
10 erreurs à éviter avant, pendant et après la pose de ton covering

-
Pose solo vs pose à deux : erreurs fréquentes et comment les rattraper

-
Voir tous les articles
covering


Vitres teintées
-
Chaleur en voiture : Pourquoi les pare-soleil classiques ne protègent pas tes enfants
 meilleure vente Vitres teintées
 -
Kit vitres teintées : Bonne ou mauvaise idée

-
Kit vitres teintées : que dit réellement la loi ?

-
Entretien des vitres teintées : astuces et produits à éviter

-
Protéger un enfant de la chaleur en été en voiture : le cas de Justine

-
Nos astuces de pro : le kit vitre teintée

-
Est-ce que les vitres teintées sur une voiture sont homologuées ?

-
Voir tous les articles
vitres teintées

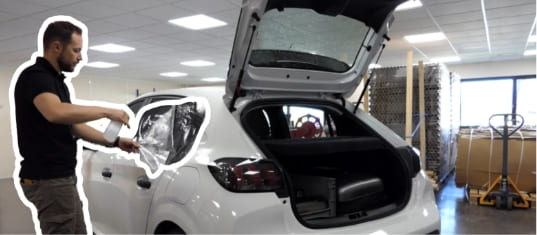
Film phares
-
Film phare et contrôle technique : réglementation et risques en 2026
 meilleure vente Film phares
 -
Entretien & jaunissement : garder des optiques nets

-
Phares et erreurs de débutant : top 10 à éviter

-
Avant d’acheter un film pour phare : les questions à se poser

-
Film anti-buée voiture : la solution efficace pour une visibilité parfaite

-
Une Giulietta unique avec un film pour phare

-
Dites adieu à la buée avec un film anti-buée pour vos rétroviseurs

-
Voir tous les articles
film phares


PPF
-
PPF coloré : L'alternative au covering et à la peinture ?
 meilleure vente PPF
 -
Quel antifouling choisir en 2026 ? Comparatif réel entre matrice dure, érodable et silicone

-
Nanoserum PPF : Protection ultime ou gadget fantaisie ?

-
PPF vs Céramique : Quelle protection choisir pour ta voiture ?

-
Peinture auto et PPF : ce que les nouvelles normes changent vraiment

-
Où poser du PPF en priorité : capot, pare-chocs, seuils, poignées ?

-
Retrait du PPF : quand et comment pour éviter les traces d’adhésif ?

-
Voir tous les articles
ppf


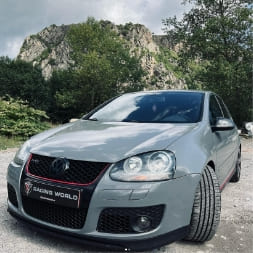
Passion auto
-
Variance Auto s’associe à Hexis : un partenariat premium qui marque un tournant
 meilleure vente Passion auto
 -
Parrainage Variance Auto : 10 € pour vous, -10 % pour eux, 100 % gagnant

-
Quelle est la meilleure solution pour protéger sa carrosserie ?

-
Préparez votre Twingo 1 pour le Twing Raid 2025 au Maroc avec style !

-
Les plus belles voitures recouvertes de covering : inspirations et idées

-
Les différentes lois sur le changement d'aspect d'un véhicule

-
Notre action pour Octobre Rose avec l'association Courir Pour Elles

-
Voir tous les articles
passion auto


Professionnels


Une équipe à votre écoute
Un projet ? Une question ? Pour tous renseignements ou devis, notre équipe d'experts est à votre disposition tous les jours par téléphone de 8h à 18h, du lundi au vendredi, mais aussi via le formulaire de contact.
Peu importe le produit que vous souhaitez, nos conseillers sauront vous guider pour que vous fassiez le meilleur choix ! Vous cherchez une référence en particulier ou une teinte originale qui n'est pas dans notre catalogue ? Faites-le nous savoir, nous mettrons tout en œuvre pour donner vie à votre projet !