Le 20/12/2023
rédigé par Lisa P.
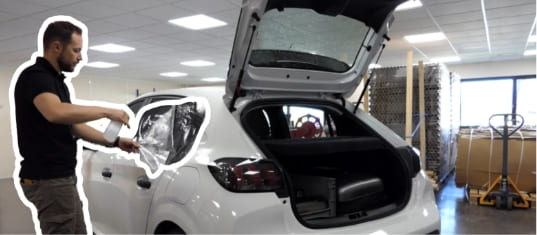
Comment réussir le passage du film teinté sur des vitres latérales derrière le lécheur ?
Pour tous types de véhicules
Réussissez la pose de votre film teinté même sur vos vitres latérales derrière le lécheur !
Pour cela, choisissez de quelle façon vous souhaitez procéder parmi les 5 solutions ci-dessous :
1 - Avec la raclette souple Yellow Contour
- Insérer doucement le film derrière le joint de la vitre
- Introduire la raclette entre le joint et la vitre et appuyer progressivement pour faire glisser le film
- Faire glisser la raclette le long du lécheur (joint en caoutchouc) pour que le film soit bien rentré sous le joint
- Terminer le marouflage sans encombre
2 - Avec la raclette "Reach"
- Après positionné avoir le film
- Faire passer le film derrière le lécheur (joint en caoutchouc)
- Insérer la raclette pour écarter le joint et faire glisser le film à l'intérieur
- Appuyer sur la raclette tout en poussant le film jusque dans l'angle
- Passer la raclette pour bien vérifier que le film est bien placer dans les angles
- Terminer le marouflage sans encombre
Cette raclette fine est très utile pour insérer votre film solaire ou sécurité auto entre la vitre descendante et le lèche vitre. Elle vous permettra la mise en place de film plus facilement et plus rapidement sans encombre. Dimensions de la raclette reach: 13,8 cm x 8,5 cm
3 - Avec palettes écarteurs
- Après avoir nettoyé votre vitre latérale
- Ecarter le joint pour y insérer une palette
- Puis introduire les 2 autres palettes entre le joint et la vitre latérale
- Glisser les 3 palettes de cette façon : une à chaque extrémité + une au centre de la vitre
- Faire passer le film derrière le joint en appuyant sur les palettes afin de créer une "ouverture"

Ce nouvel outil a été conçu pour vous faciliter la technique permettant d’écarter l’intérieur des lèches vitres et réussir votre passage du film en toute simplicité. Dimensions des palettes écarteurs : 20,3 cm x 9 cm
4 - En démontant le lécheur avec l'outil Hook Tool
- Baisser entièrement la vitre latérale
- Saisir fermement le haut de la garniture et désenclencher la partie supérieure
- Soulever le joint en caoutchouc avec la pointe du hook tool
- Tirer vers le haut à l'aide du hook tool pour déloger le joint
- Extraire le joint en le faisant glisser vers l'extérieur
- Vous constaterez que l'extraction du joint facilite grandement le passage du film
Utiliser cet outil pour extraire facilement les joints des vitres descendantes (lécheur) sans démonter la garniture de porte, afin de rentrer le film sans difficulté à l’intérieur.
5 - En démontant la garniture de la portière
Le démontage de la garniture permet de faciliter le passage du film sur toute la vitre. Nous vous invitons à vous référer à la documentation technique de votre véhicule car chaque modèle à sa propre disposition d’attaches, agrafes et/ou vis.
- Identifier les différentes attaches en vous référant à votre documentation technique (ces emplacements dépendent du modèle de votre véhicule)
- Retirer/déclipser tous les caches pour accéder aux vis
- Retirer toutes les vis généralement située au niveau des poignées et des boutons de commandes
- Décrocher le panneau en tirant avec une spatule en plastique pour faciliter le démontage au niveau des agrafes
- Extraire le joint en le faisant glisser vers l'extérieur
- Vous pouvez ensuite poser votre film teinté sans encombre
Avertissement : le démontage de la garniture est réservé à un public averti